Purpose
This document will review document revisions.
VisualVault allows users to revise any file stored in the Document Library. That is, newer versions of documents that exist in the Document Library can be uploaded without creating an entirely new document. To revise a file, users can check out and check in a document from the Document ID card or by right-clicking on the document and making the appropriate selection in the document context menu. Users will need editor or owner rights to the document in order to make revisions. As users create a new document revision, they can determine what status the document should have after it is checked in. If VisualVault is configured to allow, users can also replace a document revision through the check-in process. All revisions of a document can be viewed on the Revisions Tab of a Document ID Card.
Only editors and owners of a document will be able to see all the previous revisions of the document. Viewer users can only see the latest released revision of the document.
Checking Out Documents
Only owners or editors of a document can check the document out.
Checking out a document essentially places a "lock" on the document and all of its revisions, such that no other users can check in a new revision until the user who first checked out the document checks in their own revision. This is to prevent revision check-ins, where one version of the document is immediately out of synchronization by another new version (possibly with completely different updated data). Documents can be checked out from the document library. When a document is checked out, the ![]() icon will appear to the left of the document. When one revision of a document is checked out, no other revisions of a document can be checked out or in. All users who have access to the document may still view document revisions where they have rights. Once a document has been checked out, only the user who checked out the document or a VaultAccess user can check in a new document or undo the checkout lock.
icon will appear to the left of the document. When one revision of a document is checked out, no other revisions of a document can be checked out or in. All users who have access to the document may still view document revisions where they have rights. Once a document has been checked out, only the user who checked out the document or a VaultAccess user can check in a new document or undo the checkout lock.
All documents, including placeholder documents (documents with no file attached), can be checked out. Users may check-in documents or they may check in another placeholder document if needed.
Follow the instructions below to check out a document:
Document Check Out from Document ID Card
- Navigate to Documents and Document Library from the main menu.
- Select the Document ID of the document.
- Select the "Check Out" button.
Document Check Out with Context Menus
Users can check out a document by simply right-clicking on the document from any screen where they see a document and selecting Checkout.
If a document is checked out by mistake, the Document ID card and the Document Context Menu provide a function "Undo Check Out" to undo the check out without requiring a revision upload.
If a document is checked out and the original user is not available to check in a new version, the VaultAccess role user can perform the "Undo Check Out" function to unlock the document.
Checking in Documents
To upload a new revision to a document, the user must use the "Check-in" functionality on the document. Essentially, checking in a document is the process of uploading a document as a new revision to an already-existing document in the library, as opposed to uploading an entirely new document. There are a couple of ways to check in a new revision to a document.
Document Check-In from Document ID Card
- Find and select the Document ID of the document you will check-in. This document must be checked out by the user before the check-in option will be available.
- Select the Check-In button.

- The Check-In Document screen will be displayed along with the following "Check-In As" options:
- New Revision (Released) - This releases the latest document revision upon completion of check-in
- New Revision (Unreleased) - Allows you to store your partially completed document without releasing it to Viewers
- Replace Revision - allows you to replace an existing revision with a corrected document (used for corrections) Replace Revision can be disabled in the server's configurations. VisualVault can be configured on the server so that a default checkin state is always presented to the users. Many customers have found it advantageous to set the default checkin state to be unreleased in order to avoid initiating a configured workflow until a user makes a conscious decision to change the document state to be released.
- Enter the Revision of the document being checked in (note: the latest checked-in revision is shown above and you cannot duplicate an existing revision number)
- Enter the Change Reason (this is a required field for document change control purposes) and select Next.
Checkin Document View
- If Index Fields exist on the document, the user can change or fill out the index field data before continuing to select the document.

- Under the Select the File to Upload section select the "Browse" button to search for your document to check in and either double click on it or highlight it and select the "Open" button.
- Select the "Upload File" button and the document will be checked in and you will be returned to your originating screen.

During check-in, users may select any revision for the document as long as the revision has not been previously used. VisualVault will insert an incremental revision during check-in if the Last Revision was a number like '1' or alpha character like 'a' or 'A'. Revisions like '1.30' will not be incremented to '1.31'. If a user browses for a document and then changes their mind on the type of check-in, users will need to browse for the document again. The security rules of the check-in control do not allow VisualVault to keep the file path previously selected.
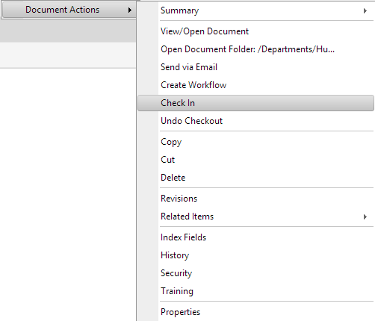
Document Check in with Context Menus
Users can check in a document by simply right-clicking on the document from any document list, then selecting Check-in from the context menu. The check-in screen will appear. Users can then follow steps 4 to 7 from the Document Check-In from Document ID Card section above.
Document Context Menu View:
Document Revision Rules
Within VisualVault there are two ways that the application can be configured to handle document revising. This topic will discuss the two modes as well as outline rules that apply. These modes apply to the entire document library when configured. The following explains the two document revision modes:
Default Mode
The default mode that VisualVault uses for managing document revisions is that if the revision is a whole number or letter, the application will automatically increment the revision unless the user keys in a specific revision. As an example, if you have a document at revision 3 and you check in a new document revision, VisualVault will increment the revision to 4. In this mode, users can key in a revision during the check-in process. VisualVault will accept that revision as long as it is unique. When users upload documents in this mode, a new document is created not a new revision. In order to increment the revisions of documents, users need to check out the document and then check in a new revision.
Automated Mode
In the automated mode, users have several options for incrementing the revision of documents. First, users can use the checkout/check-in mechanisms to upload new revisions of a document. If the revision is a whole number or letter, then VisualVault will increment the number or letter to the next logical number or letter that is unique. Users can also key in a custom revision. The second option users have to add a new revision of a document is by simply uploading a document that has the same file name as the document that already exists in VisualVault. For this second method, there are various rules that are applied to help VisualVault react to different possible scenarios. Those rules are as follows:
- When a document is uploaded to a folder, if a document already has the same file name, then increment the revision to the next unique revision. VisualVault will try to use a background revision counter that is not visible to the user first. If the revision is not unique, then the number is incremented until it is unique.
- If two Document IDs already exist that have the same file name and the user creates a new document in that folder with the same name, then VisualVault will create a third Document ID with the same file name. VisualVault does not know which of the two files it revision so the functionality falls back to the standard methods VisualVault uses for uploading documents.
To configure the automated mode, a user who has permissions to change configuration settings will navigate to the Document Library configuration section. Then in the Document subsection enable the "Enable Duplicate Filenames Create New Revisions" setting and configure the white and black lists. The white list determines which file names should have the automatic creation of new revisions. To configure the white list, key in a string of characters that VisualVault should look for in the file name. If that string of characters is matched, then VisualVault will apply the automated mode rules to the uploaded documents. When no value is in the white list, then VisualVault will apply the automated mode to all uploaded documents that are not in the black list. The black list configures VisualVault to avoid auto-incrementing the revision of documents that match the specified file name. As an example, if you want to auto-increment all the project files uploaded into VisualVault, you could configure the white list like "*ProjReport.pdf, *proj*". (The '*' is a wildcard for multiple characters).